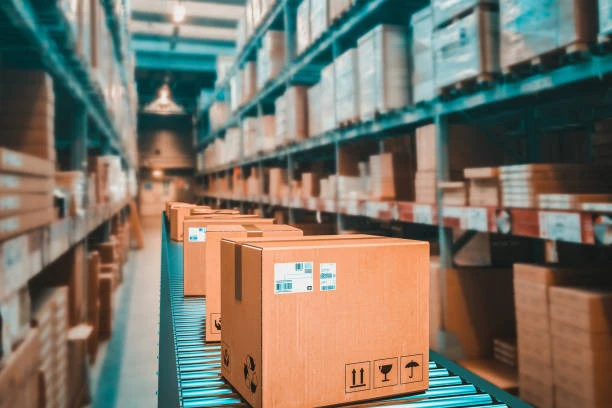
Bulk liquidation offers another route. Instead of testing, listing and selling every returned unit individually, a business can package suitable merchandise into commercial lots and present it to professional liquidation buyers. The transaction may involve a lower recovery per item than direct retail resale, but it can reduce labor, storage time and uncertainty.
A successful sale depends on preparation. Customer returns vary widely in condition, and buyers need enough information to understand what they are evaluating. A clear grading process, accurate manifest, representative photographs and appropriate safety checks can make the lot easier to assess and reduce misunderstandings later.
This guide explains how to liquidate customer returns in bulk, from the initial audit to final pickup.
Why Customer Returns Require a Separate Liquidation Strategy
Returned merchandise is not the same as standard overstock. Overstock usually consists of unused products that remained unsold. A customer-return lot may contain several conditions within the same SKU:
- New and unopened products
- Open-box items with intact contents
- Products with damaged retail packaging
- Items showing light use
- Incomplete products or missing accessories
- Products requiring testing or refurbishment
- Units with functional or cosmetic defects
- Items that should not be resold
This variation affects value and marketability. A buyer cannot reasonably evaluate a return lot based only on the original retail price or the total number of units. The expected condition mix, product demand, testing status, packaging, shipping cost and potential resale channels all influence an offer.
Returned inventory may also require additional review for recalls, hygiene restrictions, warranties, data security or regulated disposal. Separating those issues before marketing the lot protects the seller and helps the buyer concentrate on merchandise that can legitimately enter a secondary market.
When Bulk Liquidation May Be the Right Choice
Not every return should be liquidated. High-value items in excellent condition may justify testing, repackaging and direct resale. Low-value products may cost more to inspect individually than the business could recover from them.
Bulk customer return liquidation may be appropriate when:
- Return volume exceeds internal processing capacity
- Products have been stored without a clear resale plan
- Individual testing and relisting costs are too high
- Warehouse space is needed for active inventory
- The business wants one transaction instead of hundreds of small sales
- A product line, season or retail programme has ended
- The assortment contains many low- or mid-value items
- The business needs a predictable inventory exit
- Returns are spread across several conditions but can be documented
The decision should compare net outcomes. Estimate what the company could recover through internal resale, then subtract testing, labour, packaging, platform fees, storage, customer service, additional returns and the time required to complete those sales. Compare that figure with the net value and operational relief offered by a bulk transaction.
Step 1: Isolate Returned Inventory From Regular Stock
Returned products should be physically and digitally separated from new inventory. Mixing conditions creates count errors and makes it difficult to provide an honest description of the lot.
Create a designated area for unprocessed returns and use labels or warehouse locations that identify their status. At minimum, distinguish among:
- Awaiting inspection
- Inspected and restockable
- Approved for liquidation
- Requires testing
- Damaged or incomplete
- Quarantined for compliance review
- Not suitable for resale
If returns are held by a third-party logistics provider, ask for current location reports and confirm whether the provider can separate inventory by disposition code. Do not assume the warehouse system’s condition label is accurate without understanding how that label is assigned.
Step 2: Create a Consistent Condition-Grading System
Condition descriptions should be specific enough for an outside buyer to understand. Avoid vague labels such as “good,” “mixed” or “like new” unless those terms have written definitions.
A practical grading framework could include:
Grade A: New or unopened
The product remains unused and factory sealed, with clean packaging and no known defects. If the item was returned but never opened, explain how that was verified.
Grade B: Open box or shelf-ready
The original packaging has been opened or shows minor wear, but the product appears complete and unused. State whether accessories, manuals and inserts were checked.
Grade C: Used or cosmetically imperfect
The product shows signs of use, handling or cosmetic damage but may remain functional. Describe the testing performed instead of implying full functionality without evidence.
Grade D: Incomplete, damaged or untested
The product may be missing parts, require repair or have unknown functionality. This category should clearly state whether items are sold for refurbishment, parts or further inspection.
Non-resalable
The item should be excluded from ordinary resale because of a recall, contamination risk, severe damage, missing legal labels, restricted category or another material issue.
The exact names of the grades matter less than consistency. Define each grade in the manifest or an accompanying document and apply it in the same way across the lot.
Step 3: Decide How Much Testing Is Economically Sensible
Testing can improve buyer confidence, but it also requires time, equipment and trained staff. The appropriate level depends on product value and risk.
For low-cost general merchandise, a representative sample may be more economical than testing every unit. For electronics, tools or appliances, basic power-on testing may materially affect value. Higher-value items may justify serial-number tracking and more detailed functional checks.
Document the test rather than simply writing “tested.” For example:
- Powered on successfully
- Screen and buttons responded
- Motor operated during a brief test
- Battery accepted a charge
- Product passed the manufacturer’s diagnostic process
- Exterior inspection only; functionality not tested
If only a sample was tested, state the sample size and selection method. Do not apply the result to the entire lot unless every unit received the same check.
Step 4: Screen for Recalls and Restricted Products
Returned merchandise must be reviewed before it is offered for resale. A recalled product should not be placed into a general liquidation lot merely because it appears functional.
Businesses handling consumer goods can check the U.S. Consumer Product Safety Commission recall database for relevant recall notices. Food, medicines, medical devices, cosmetics and certain other regulated products may also require review through the U.S. Food and Drug Administration recalls and safety alerts.
Depending on the category, additional checks may include:
- Expiration or best-by dates
- Batch and lot numbers
- Safety warnings and required labels
- Country-specific compliance markings
- Product registrations
- Warranty limitations
- Software support
- Hazardous-material shipping rules
- Hygiene restrictions
- Data stored on returned electronic devices
Create a quarantine process for items that require further investigation. If a product cannot legally or safely be resold, use the appropriate return-to-vendor, recycling, destruction or disposal process instead of mixing it with marketable goods.
This article provides operational guidance, not legal advice. Sellers should consult qualified compliance or legal professionals when product-specific requirements are unclear.
Step 5: Build an Accurate Customer Returns Manifest
The manifest is one of the most important documents in a bulk return transaction. It allows a buyer to identify the products, estimate the condition mix and understand the scale of the opportunity.
Use one row per SKU and condition grade. If the same SKU includes unopened, open-box and damaged units, separate those quantities rather than combining them into a single line.
Include the following fields where available:
- Internal SKU
- UPC, EAN or GTIN
- Brand
- Product name and description
- Model, size, colour or variant
- Total quantity
- Quantity by condition grade
- Testing status
- Missing components, if known
- Original case pack
- Original wholesale price or MSRP, if relevant
- Approximate product age
- Lot, batch or date code when applicable
- Warehouse location
- Number of pallets or cartons
- Estimated weight and dimensions
- Notes about packaging or visible damage
GS1 explains that the Global Trade Item Number is used to identify trade items uniquely. Including accurate product identifiers helps a buyer distinguish between similar models, package sizes and product generations. Refer to the official GS1 GTIN guidance when validating identifiers.
Check the final totals carefully. The quantity in the summary email, manifest and warehouse report should agree. If counts are estimated, mark them as estimates and explain when a final verification can occur.
Step 6: Photograph the Inventory Honestly
Manufacturer images may identify an item, but they do not demonstrate the current state of returned stock. Provide recent warehouse photographs that represent the actual lot.
Useful images include:
- Wide photographs of the pallets or storage area
- Several representative products from each grade
- Front and back of retail packaging
- Model numbers and product labels
- UPC or GTIN labels
- Typical packaging damage
- Typical cosmetic wear
- Missing accessories or incomplete sets
- Pallet labels and carton markings
- Date codes for time-sensitive categories
Photograph both stronger and weaker examples. If the lot includes crushed boxes, opened cartons or visibly used products, show them. Selective photography may generate initial interest, but it increases the risk of a failed inspection or dispute.
Organise photographs into clearly named folders. Matching image names to SKU numbers makes review faster, especially when the lot contains many products.
Step 7: Separate High-Risk and Low-Value Material
Some goods should not be included simply to increase the unit count. Remove items that create disproportionate risk or handling expense.
Examples may include:
- Recalled products
- Leaking or contaminated goods
- Broken glass
- Swollen or damaged batteries
- Expired merchandise
- Products missing mandatory safety labels
- Personalised items
- Password-locked electronics
- Products containing customer information
- Empty packages
- Unidentifiable loose parts
The buyer should know if the lot contains repairable items or parts-only units, but those categories must be intentional and clearly documented. A clean separation between saleable, repairable and disposal inventory improves the integrity of the offer.
Step 8: Protect Customer Data
Returned electronics can contain names, photographs, messages, account credentials and other personal information. Phones, tablets, computers, cameras, smart-home devices and connected appliances may retain data even when the customer reports that the device was reset.
Create a documented data-handling process before transferring such products. Depending on the item and business obligations, this may involve secure wiping, factory-reset verification, removal of storage media or certified destruction.
Do not assume a liquidation buyer will perform data sanitisation unless that responsibility is explicitly included in the agreement. Define who handles the data, what standard is used and what documentation is required.
Step 9: Package Returns for Safe and Efficient Handling
Customer returns often arrive in inconsistent packaging. Before requesting final freight arrangements, stabilise the lot so it can be counted, inspected and transported safely.
Recommended preparation includes:
- Grouping the same SKU and grade together where practical
- Placing small loose items into labelled cartons
- Securing liquids upright and checking for leaks
- Protecting fragile goods with appropriate packing material
- Keeping batteries and regulated materials in compliant packaging
- Labelling every pallet with a unique number
- Matching pallet numbers to the manifest
- Recording pallet dimensions and weights
- Stretch-wrapping loads without hiding their identity
If the warehouse cannot rework the pallets, disclose the current configuration. A buyer can then account for sorting and handling requirements when evaluating the lot.
Step 10: Define Acceptable Resale Channels
Returned goods may reappear in marketplaces, discount stores, export channels, auctions, repair networks or parts markets. Before accepting an offer, determine whether any channels, territories or uses are restricted.
Consider questions such as:
- Can the products be resold on major online marketplaces?
- Are domestic and export sales both acceptable?
- Must products be de-labelled or de-branded?
- Are warranty claims available to the next purchaser?
- Must customer-facing inserts be removed?
- Are certain retail accounts or geographic regions excluded?
- Can nonfunctional products be sold for parts?
- Is proof of recycling or destruction required for rejected units?
Use precise written terms. A general instruction to “protect the brand” can be interpreted differently by each party. Clear channel restrictions and handling requirements are easier to price, follow and verify.
Step 11: Submit the Lot to a Liquidation Buyer
Once the lot is organised, provide a concise summary with the manifest and photographs. The initial submission should state:
- Main product categories
- Total number of units
- Approximate condition breakdown
- Number of pallets or truckloads
- Warehouse location
- Testing performed
- Important compliance or date information
- Whether the entire lot must be purchased
- Desired removal timeline
- Any resale restrictions
Excess Liquidation Buyers states that it considers inventory in several conditions, including customer returns, shelf pulls and refurbished goods. Review the company’s inventory buying information and use the Submit Your Inventory form to provide the lot details and available files.
If the buyer requests more information, answer with documented facts. Avoid estimating defect rates, test results or completeness unless the method behind the estimate is clear.
Step 12: Evaluate the Full Transaction, Not Just the Offer Price
The highest headline offer does not always create the best net outcome. Compare the complete terms of each proposal.
Review:
- Total purchase amount
- Inventory included and excluded
- Payment method and schedule
- Inspection conditions
- Freight responsibility
- Loading and labour requirements
- Pickup timing
- Treatment of quantity differences
- Treatment of unexpected conditions
- Resale restrictions
- Documentation and recordkeeping
- Responsibility for unusable units
Subtract any seller-paid freight, sorting, testing, repacking, brokerage or disposal expenses. Also consider how long the transaction will take and whether the buyer can remove the full lot.
A slightly lower offer that covers the whole approved lot and provides workable pickup terms may deliver more value than a higher offer that selects only the easiest products and leaves the seller with damaged or low-demand remnants.
Step 13: Prepare for Inspection and Pickup
After terms are agreed, keep the inventory stable. Do not remove desirable units or add unlisted merchandise unless the buyer approves an updated manifest.
Before pickup:
- Reconcile the final unit and pallet count
- Place pallets in an accessible loading area
- Confirm dock hours and appointment requirements
- Verify pallet weights and dimensions
- Label every pallet clearly
- Separate products excluded from the sale
- Photograph the prepared shipment
- Confirm the warehouse contact
- Retain transaction, payment and freight records
If the quantity or condition changes, notify the buyer before arrival. Transparent communication helps prevent delays and protects the working relationship.
Common Mistakes When Liquidating Customer Returns
Calling the entire lot “untested” without explanation
Untested can mean unopened, visually inspected, partially sampled or completely unknown. Explain what has and has not been done.
Using original retail value as the only pricing benchmark
Retail price does not account for condition, testing, missing parts, freight or secondary-market demand. Use it as one reference point, not a guaranteed recovery value.
Mixing conditions in one quantity
A single count for a highly variable lot creates uncertainty. Separate the condition grades whenever reliable information is available.
Hiding damaged inventory
Undisclosed damage can derail an inspection or lead to a post-sale dispute. Representative disclosure supports a more dependable transaction.
Including recalled or restricted products
Screen inventory before offering it for resale. Quarantine anything requiring compliance review.
Waiting until the warehouse deadline
A rushed sale leaves less time for counting, photography, buyer questions and freight planning. Begin the process before storage pressure becomes an emergency.
Forgetting data security
Connected products may retain personal data. Assign responsibility for sanitisation before ownership changes.
How to Improve Future Returns Management
Liquidation solves an immediate inventory problem, but return data can also reveal ways to reduce future accumulation.
Track return reasons by SKU, supplier, sales channel and customer segment. Look for patterns involving:
- Incorrect product descriptions
- Sizing or compatibility confusion
- Packaging damage
- Missing instructions
- Product defects
- Delivery problems
- Misleading images
- Quality differences among suppliers
Set disposition rules so warehouse staff know when a unit should be restocked, refurbished, liquidated, recycled or destroyed. Establish age thresholds for unresolved returns and schedule regular reviews rather than allowing pallets to remain untouched.
The strongest system treats liquidation as a planned disposition channel—not a decision made only when the warehouse runs out of space.
Turn Returned Merchandise Into an Organised Inventory Exit
Customer returns can be complicated, but the liquidation process becomes more manageable when the information is organised. Separate the stock, define condition grades, perform economically sensible testing, check recalls and restrictions, create a detailed manifest and provide honest photographs.
These steps do not guarantee a particular offer. They reduce uncertainty and allow a buyer to evaluate the actual products, condition mix, logistics and resale requirements more efficiently.
If your business has customer returns, open-box goods, shelf pulls or other excess merchandise available in bulk, submit your inventory for review. Include your manifest, representative photographs, warehouse location and preferred pickup timeline to support the evaluation.
Frequently Asked Questions
Can customer returns be sold in bulk without testing every item?
Possibly. Whether full testing is necessary depends on the category, value and risk. If items are untested or only sampled, disclose that clearly and describe the sampling method.
What should a customer returns manifest include?
Include the SKU, UPC or GTIN, product description, quantity, condition grade, testing status, missing components, location, pallet count and relevant date or compliance information.
Do liquidation buyers purchase mixed-condition returns?
Some buyers evaluate mixed-condition lots, but clear grading and an approximate condition breakdown make the inventory easier to assess. Do not present used or damaged returns as new merchandise.
How are bulk customer returns valued?
Value depends on product demand, condition mix, testing, completeness, packaging, quantity, freight, restrictions and expected resale costs. Original retail value alone does not determine the offer.
Can recalled products be included in a liquidation lot?
Recalled products should be quarantined and handled according to the recall instructions and applicable requirements. They should not be mixed into a normal resale lot.
Who handles freight for a bulk return sale?
Freight responsibility varies by transaction. Confirm who arranges pickup, who pays, what equipment is required and when risk transfers before accepting the offer.
What photographs should I provide?
Provide current warehouse photographs of the pallets, product labels, packaging, representative units from each condition grade, visible damage, missing components and relevant date codes.
How can a business protect its brand during return liquidation?
Define permitted resale channels, territories, de-branding requirements and warranty disclosures before the sale. Put any agreed restrictions in writing and make sure they are practical for the buyer to follow.